| Oracle® Warehouse Builder Installation and Administration Guide 11g Release 2 (11.2) for Windows and Linux Part Number E10579-01 |
|
|
View PDF |
| Oracle® Warehouse Builder Installation and Administration Guide 11g Release 2 (11.2) for Windows and Linux Part Number E10579-01 |
|
|
View PDF |
This section discusses how to implement security options for Oracle Warehouse Builder.
This section includes the following topics:
Warehouse Builder enables you to define security on the metadata stored in the design repository. Warehouse Builder metadata security operates in conjunction with Oracle Database security, with Oracle Database provides security for data, while Warehouse Builder provides security for the metadata.
In addition to being registered in the repository, all users must also be database users in the design repository database. Database users may access the data in the database by using SQL*Plus, but they cannot have access to Warehouse Builder and its metadata unless they are also registered in Warehouse Builder.
Metadata security is both optional and flexible. You may choose not to apply any metadata security controls, or define a metadata security policy. You have the option to define multiple users, and apply either full security control or none. You may also implement a custom security strategy based on the security service. After you define a custom security strategy, you may adapt it over time to be more or less restrictive.
The topics in this section describe how to implement metadata security using the Design Center. You may also implement security through OMB Plus. For more information, refer to the Oracle Warehouse Builder API and Scripting Reference.
Only users with administrative privileges can access the security service under Globals Navigator to manage users and roles of the security policy in Warehouse Builder.
When you install Warehouse Builder and then use the Repository Assistant to create a design repository, Warehouse Builder makes the design repository owner the default administrator. The first time you start the Design Center after installation, you must log in as the design repository owner. You can then define additional administrators or other users as necessary.
When you log into the Warehouse Builder Design Center as the design repository owner, it displays the Globals Navigator.
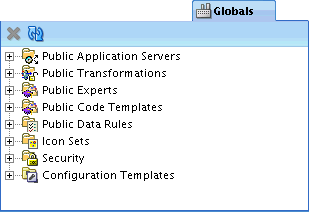
To view default security settings:
In Globals Navigator, expand Security.
Expand Users, and then expand Roles.
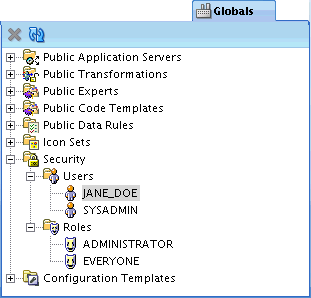
Notice that there are two predefined roles, ADMINISTRATOR and EVERYONE.
The one predefined user is the design repository owner; it is assigned the ADMINISTRATOR role by default.
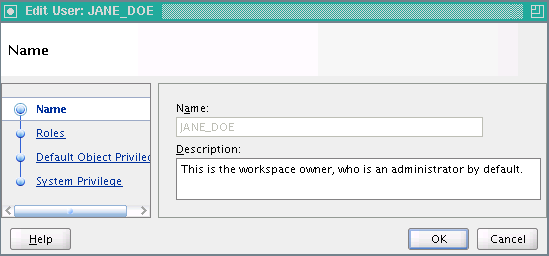
To view or edit the details for a user, in the globals Navigator, under Security and then under Users, select that and double-click the user. The Edit User screen appears.
For a complete list of all the tasks administrators can perform, see "Administrator Role".
Warehouse Builder enables you to design a metadata security strategy that fits your implementation requirements. As you define your metadata security strategy, recognize that more restrictive policies are more time consuming to implement and maintain.
Consider modeling your strategy based on one of the following security strategies:
Minimal metadata security is the default security policy when you create a new design repository. As your project requirements change over time, you may apply other metadata security strategies. For example, you may not need extra metadata security if you are implementing an internal pilot project, or if you anticipate only few trusted users.
In the case of a minimal metadata security strategy, all users may log into Warehouse Builder with the same user name and password, that of the design repository owner. Oracle Database security policies keep the data in the design repository secure, and the metadata is available to anyone who knows the design repository owner logon information. All users can create, edit, and delete all objects.
If your implementation has multiple users and you want to track who performs what operations, implement a multiuser security strategy. This strategy restricts to a single user the rights and access granted to the design repository owner. Although this strategy does not restrict user access to metadata objects, you can apply restrictions at a later date.
To implement security for multiple users:
Log into Warehouse Builder as an administrator and complete the instructions in the following sections:
This section describes a process for applying all the metadata security options available in Warehouse Builder. You can enable all or some of these options. For instance, you could take steps one through three but ignore the remaining steps.
Be sure to edit the security properties for all projects in the Project Navigator. By default, the EVERYONE role has FULL_CONTROL object privileges. To change this, select the project and then, from the View menu, select Security. Edit the privileges to the EVERYONE role to be more restrictive, and then press Propagate Security Settings icon on the upper left corner. This action applies the new restrictions to all children of this project. For newly created projects and other objects, use the default object privilege setting of OWB users to define access privileges.
To implement full metadata security for multiple users:
Log into Warehouse Builder as an administrator and complete the instructions in the following sections:
Set the parameter Default Metadata Security Policy to maximum.
In the Design Center select Tools, Preferences, expand OWB, and then select Security Parameters.
The Default Metadata Security Policy you set in step one of these instructions is not retroactive. It applies only to users you register after changing the setting. You must manually edit the profiles of preexisting users.
All Warehouse Builder users must also be Oracle Database users.
You can create new OWB users in one of two ways:
Use Warehouse Builder to register existing database users, or to create new ones.
Note that you must have the database CREATE USER privilege to create a new user.
Create new database users and then register them in Warehouse Builder.
Note that even though it is possible to create users in SQL Plus, Oracle recommends that you create users through the Warehouse Builder interface. This ensures that users are assigned all necessary roles and privileges.
For security reasons, you cannot register database administrator users, for example SYS. Also, the database default role settings must not be set to ALL. Note that OWB automatically sets the "database default role setting" for new users. You may change the database default role settings as described in "Changing Database Default Roles".
This section explains how to register existing database users.
To register existing database users:
In the Globals Navigator, under Security, right-click Users and select New User.
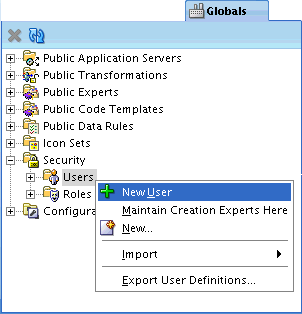
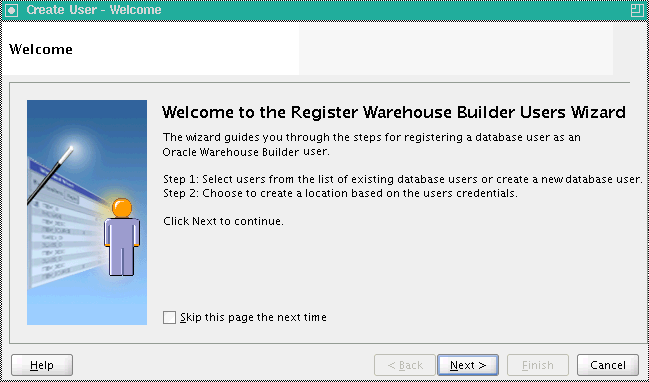
The Create User: Welcome screen appears.
On the Create User Welcome screen, click Next.
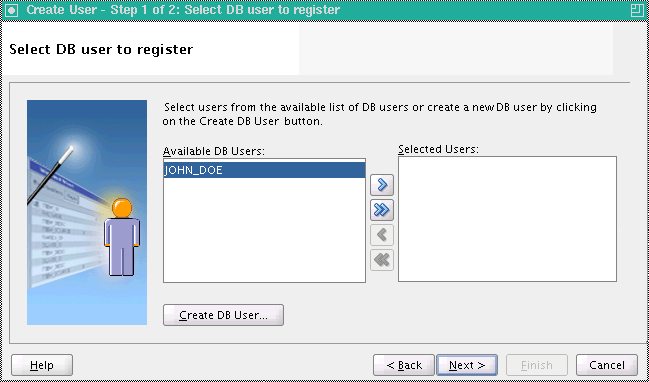
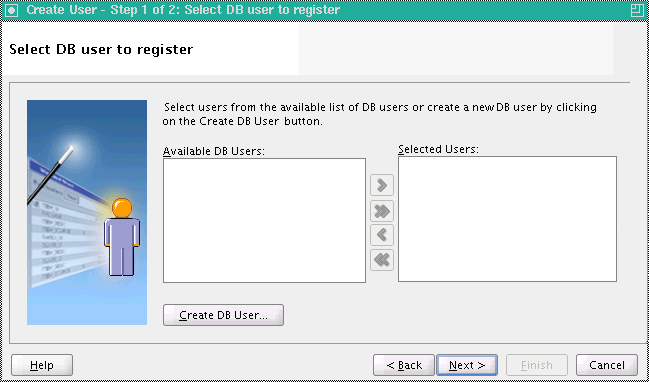
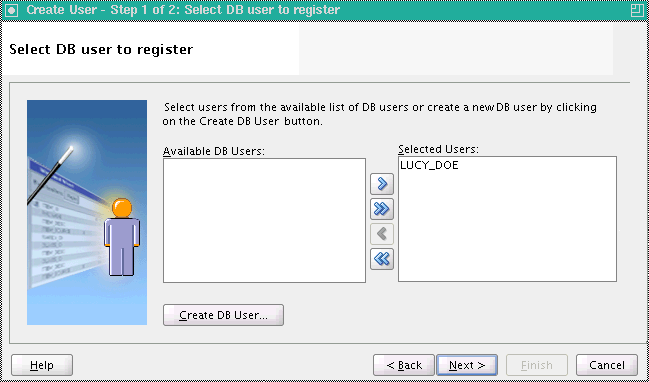
On the Select DB user to register screen, under Available DB Users, select the user or users you want to register, and click the appropriate transfer icon to add the user or users to the Selected Users list.
Click Next.
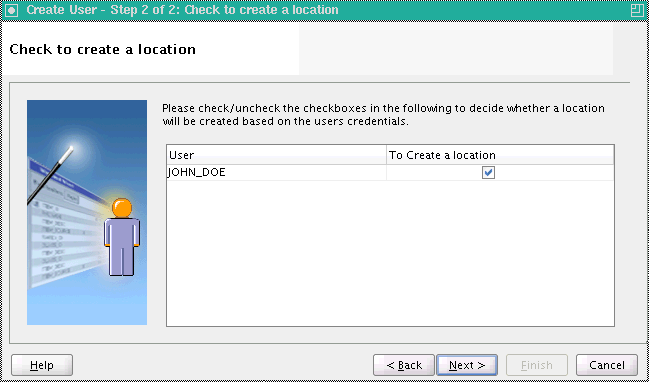
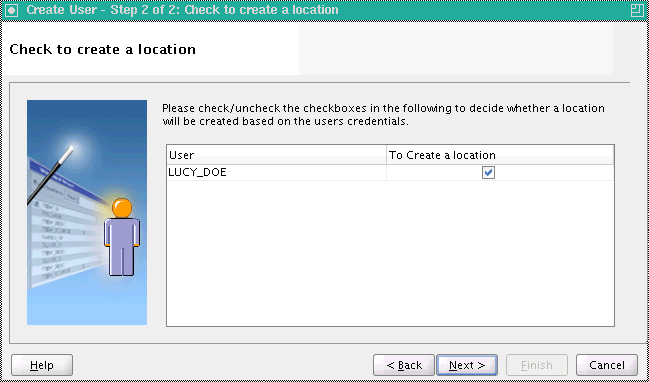
On the Check to create a location screen, check Create option next to the user you are registering.
Click Next.
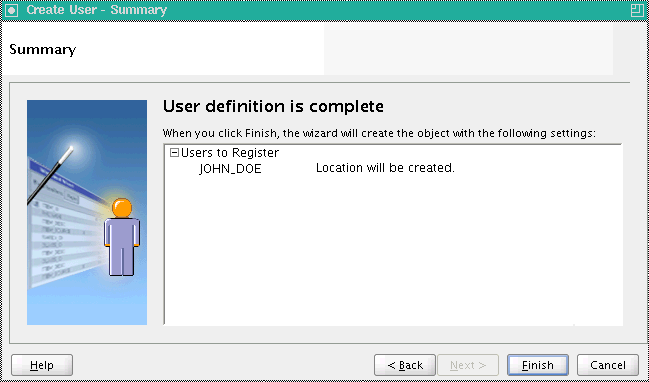
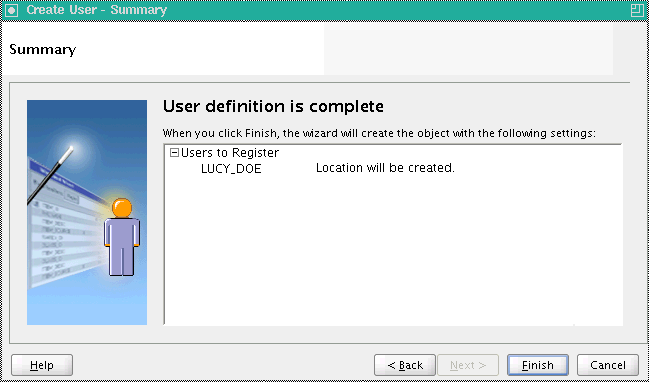
On the Summary screen, review the new user definition.
Click Finish.
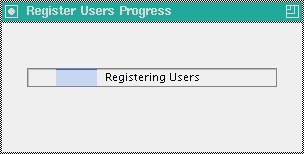
The Register Users Progress appears. It disappears when registration is complete.
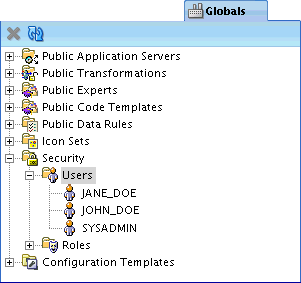
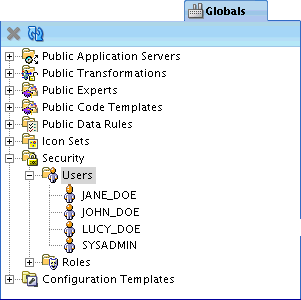
Note that your new user is now listed under Users.
This section explains how to create new database users. You must have the database system privilege CREATE USER.
To create a new database user:
In the Globals Navigator, under Security, right-click Users and select New User.

The Create User: Welcome screen appears.
On the Create User Welcome screen, click Next.

On the Select DB user to register screen, click Create DB User.
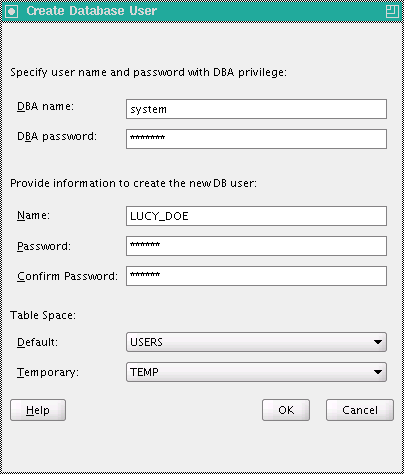
On the Create Database User screen, enter the DBA password, and the Name and Password (with confirmation) of the new user.
Click OK.
Note that you must specify a valid user name and password, and adhere to the security standard implemented on the Oracle Database. For more information about user names, passwords, and password complexity verification routines, refer to Oracle Database Security Guide.
Note that on the Select DB user to register screen, the new user is automatically added to the Selected Users list.
Click Next.
On the Check to create a location screen, check Create option next to the user you are registering.
Click Next.
On the Summary screen, review the new user definition.
Click Finish.
The Register Users Progress appears. It disappears when registration is complete.

Note that your new user is now listed under Users.
For security reasons, you cannot register database users that have ALL default roles in the database. However, it is possible to change this default setting by correcting the role assignment. There are two options: Fix Now and Fix Later.
Fix Now
If you select the Fix Now option, type the user name and password with SYSDBA privileges. The user is registered, and the necessary commands are issued.
For example, when you register new users, the database role OWB_repository_name is assigned to each user. For security reasons, this role must not be the default role of any registered user. If you attempt to register a user under these conditions and then select Fix Now, the user is registered and the following command is issued:
alter user username default role all except OWB$CLIENT
Fix Later
If you select the Fix Later option, the user is not registered. You must manually change the default role setting in the database using SQL, and then register the user in OWB. To manually change the setting, connect to the database as a user with the ALTER USER system privilege and issue the required commands.
Note the following SQL script for changing the default roles of selected users. It changes the default role setting so that any role subsequently granted to the user cannot be the default role of that user. To change this, register the user and then issue a the following command:
alter user username default role all except OWB$CLIENT
For each user, you can enter an optional description, assign the user to existing Roles, specify the Default Object Privilege and the System Privileges.
These are Oracle Database users, so you cannot rename a user in OWB; you must do that trough Oracle Database.
Note that the granting or revoking of roles and privileges only takes effect in the next session OWB.
To edit a user profile:
In the Globals navigator, expand Security.
Expand Users.
Select the name of the user for editing. Right-click the user name, and select Open.
The Edit User: Username screen appears. It contains the following options for editing
Name: you cannot change the name itself, but the screen contains an editable Description text field.
Roles: you may assign various roles to the user by moving them from the list of Available Roles to the list of Granted Roles.
Default Object Privilege: you may assign default privileges to either Users or Roles by checking the appropriate boxes under FULL_CONTROL, EDIT, COMPILE, or READ.
System Privilege: you may assign system privileges to the user by checking appropriate boxes under Object System Privilege (ACCESS_PUBLIC_VIEW_BROWSER, CREATE_PLATFORM, CREATE_PROJECT, or CREATE_SNAPSHOT) and Control Center System Privilege (CONTROL_CENTER_DEPLOYMENT, CONTROL CENTER_EXECUTION, or CONTROL_CENTER_VIEW).
When the edits are complete, click OK.
You can assign a user to one or more roles. If you assign multiple roles with conflicting privileges, then the user is granted the more permissive privilege, which is the union of all the privileges granted to the multiple roles. For example, if you assign to the same user a role that allows creating a snapshot and a role that restricts it, then the user is allowed to create snapshots.
If you want to assign a user to a role that does not display on the Available Roles List, close the editor, create the new role, and then edit the user account. To create a new role, right-click Roles under the Security node in the Globals Navigator and select New Role. For information on creating and editing roles, see Defining Security Roles and Editing Role Profiles.
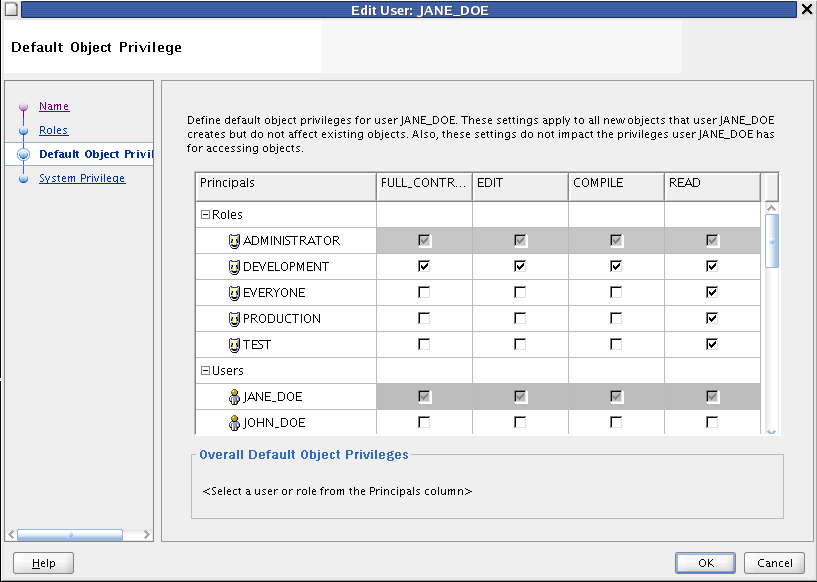
Default object privileges define the access other users and roles have to objects that the selected user creates. These privileges do not impact the privileges the user has for accessing objects created by other users.
For example, for all objects that JANE_DOE creates, JANE_DOE, as well as ADMINISTRATOR and DEVELOPMENT roles, have full access. Note that EVERYONE, PRODUCTION, and TEST roles are restricted to read-only.
If you are familiar with UNIX operating system security, note that the default object privilege is similar to the UMASK command. When you edit the default object privilege, the change only effects objects the user creates subsequently; there is no effect on previously created objects. Therefore, if you set default object privileges early, you can expect little or no additional object-level security management.
To define the privileges other users have to objects the selected user creates, check the appropriate box for each role or user. You can grant the following privileges: FULL CONTROL, EDIT, COMPILE, and READ. All the privileges are additive. If you select COMPILE, then you apply both the compile and read privileges.
Note that access may be granted both to roles and to individual users. Note, however, that when you grant access to a role, the privilege is extended to all users in that role. For example, even though JOHN_DOE is not specifically granted access, he has read access through the EVERYONE role. Furthermore, if JOHN_DOE is a member of the DEVELOPMENT role, he has full control and access.
By default, when you create a new user, the EVERYONE role has full control on all objects. To enable metadata security, edit all user profiles and restrict the access the EVERYONE role has to objects each user creates.
Securing Metadata Objects Throughout their Life Cycle
Default object privileges work in conjunction with object security properties to provide security options throughout the life cycle of a given metadata object. Settings you specify on the Default Object Privilege tab persist until a qualified user overrides the restrictions, on an object-by-object basis.
Assume that JANE_DOE creates several mappings. When JANE_DOE designs and develops these objects, the security policy described earlier in this section may be desirable. However, assume that JANE_DOE completes the mappings and releases the objects to the testing team. In this case, the default object privilege is too restrictive. To extend access to the TEST role, JANE_DOE can select the mapping, then from the View menu, select Security. She can then manually add all necessary privileges to the TEST role.
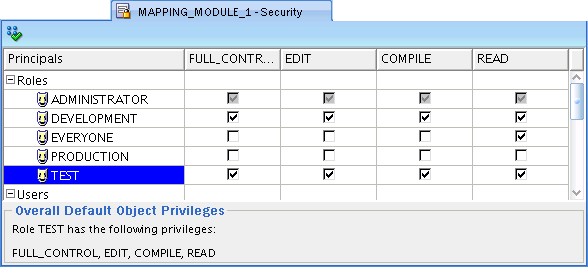
For more details on overriding the default security on an object by object basis, see "Applying Security Properties on Specific Metadata Objects".
Object privileges apply to all metadata objects in the repository including projects, modules, and collections.
FULL CONTROL
Full control includes all the other privileges plus the ability to grant and revoke privileges on an object. Only users with full control over an object can override default security on an object-by-object basis as described in "Applying Security Properties on Specific Metadata Objects".
EDIT
The edit privilege includes the compile, and read privileges. Additionally, edit allows users to delete, rename, and modify an object.
COMPILE
The compile privilege includes the read privilege and enables you to validate and generate an object.
READ
The read privilege enables you to view an object.
System privileges define user access to workspace-wide services. Use the System Privilege tab to allow or restrict users and roles from performing administrative tasks.
You can control access to the following operations:
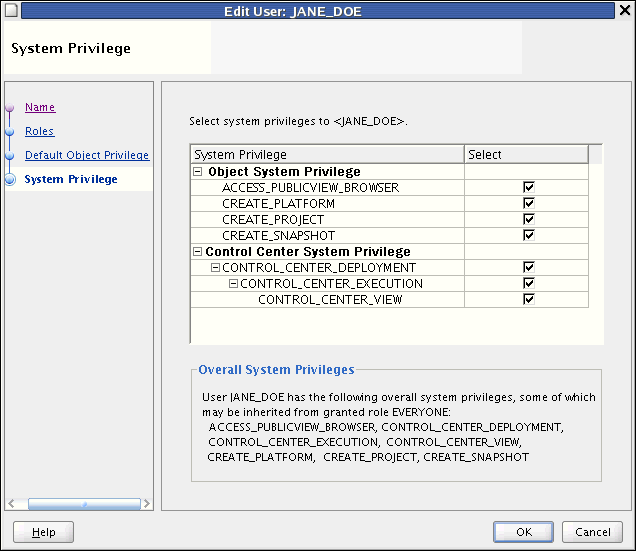
ACCESS_PUBLICVIEW_BROWSER: Allows users to access the Repository Browser.
CREATE_PLATFORM: Allows users to create new platforms in the workspace using OMB*Plus.
CREATE_PROJECT: Allows users to create projects, which administrators create projects as a means of organizing metadata objects.
CREATE_SNAPSHOT: Allows users to create snapshots which administrators use when backing up workspaces.
CONTROL_CENTER_DEPLOYMENT: Allows users to deploy to the Control Center and then run those procedures.
CONTROL_CENTER_EXECUTION: Allows users to run procedures from the Control Center.
CONTROL_CENTER_VIEW: Allows users to view procedures from the Control Center.
Warehouse Builder enables multiple users to access the same Warehouse Builder repository at the same time by managing read/write privileges. Only one user is given write privileges to an object at any given time. All other users can have read-only access. If a user has write access to an object, Warehouse Builder maintains a lock on the object while the object editor is open. If no changes were made to the object, then the lock is released as soon as the object editor is closed. If changes were made, then the lock is maintained until the user closes all editors associated with the object and either saves the changes or reverts to the last saved version. Other users cannot delete an object while it is in use.
Whenever you open an editor, property sheet, or dialog box, you access objects in read/write mode by default. Your changes are available to other users only after you save them to the repository.
If you attempt to open an object locked by another user, or if you have only READ permissions for the object, then Warehouse Builder displays a message that prompts you either to cancel the request or access the object in read-only mode. If you choose to continue in read-only mode.
A user who is editing an object in READ/WRITE mode may save changes while a user with read-only privileges views the object. To synchronize the object with the repository, click Refresh.
You can use roles to represent groups of users with similar responsibilities and privileges. Unlike users which are also database users, these roles are not database roles. These roles are purely design constructs for implementing security within the product.
Roles enable you to more efficiently manage privileges because it is more efficient to grant or restrict privileges to a single role rather than multiple users.
The Everyone Role and the Administrator Role are predefined roles. You edit the privileges but cannot delete or rename the predefined roles.
To create a new role:
In the Globals navigator, expand Security.
Under Security, select Roles.
Right-click Roles, and select New Role.
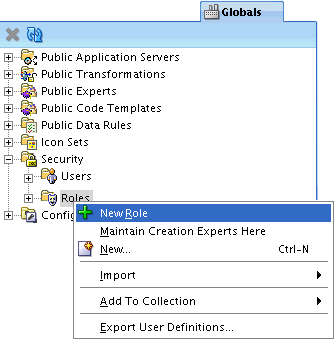
On the Create Warehouse Builder Role screen, enter the Role Name.
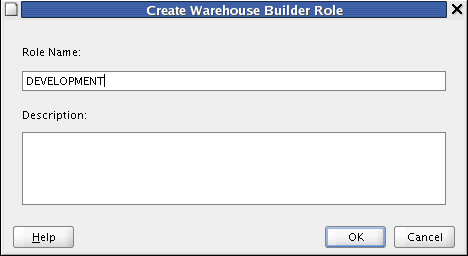
Click OK.
Use this role to easily manage privileges for all users. When you register new users, Warehouse Builder assigns those users to the EVERYONE role by default.
Administrators in Warehouse Builder can perform various security tasks, such as:
Changing User Passwords
You cannot change user passwords from within Warehouse Builder. Change passwords directly in the Oracle Database as described in Oracle Database Security Guide.
Deleting Users and Roles
You may delete users by right-clicking in the Globals navigator, and selecting Delete. You may delete all OWB users expect the repository owner. Note that this does not delete or alter the user account in the Oracle Database.
You can delete all OWB users expect for the design repository owner. Deleting a user from OWB does not delete or alter the user account on the Oracle Database.
You can delete all OWB roles expect ADMINISTRATOR and EVERYONE roles. Deleting a role from OWB does not delete or alter roles in the Oracle Database.
Renaming Roles
From the Globals Navigator, right-click a role and select Rename. You can rename all roles expect the predefined administrator and everyone roles.
For each role that you create, you can edit the name, enter an optional description, assign the role to existing Users, and specify the system privilege. You cannot rename or edit the descriptions for the predefined roles EVERYONE and ADMINISTRATOR, nor can you delete them. Note that Warehouse Builder roles and database roles are separate constructs; therefore, deleting a Warehouse Builder role has no effect on the database. For more information on system privilege, see System Privileges.
To alter default security privileges for a role:
In the Globals navigator, expand Security.
Under Security, expand Roles.
Select the role to edit, and right-click. From the menu, select Open.
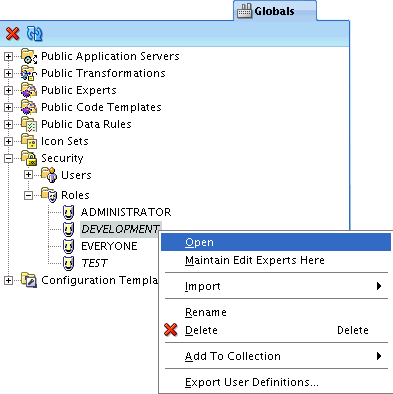
In the Edit Role: RoleName window, you may do any one of the following:
Name: you cannot change the name itself, but the screen contains an editable Description text field.
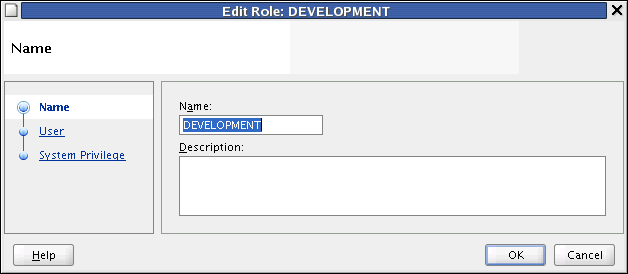
User: you may assign various users to the role by moving them from the list of Available Users to the list of Grantees.
System Privilege: you may assign system privileges to the role by checking appropriate boxes under Object System Privilege (ACCESS_PUBLIC_VIEW_BROWSER, CREATE_PLATFORM, CREATE_PROJECT, or CREATE_SNAPSHOT) and Control Center System Privilege (CONTROL_CENTER_DEPLOYMENT, CONTROL CENTER_EXECUTION, or CONTROL_CENTER_VIEW).
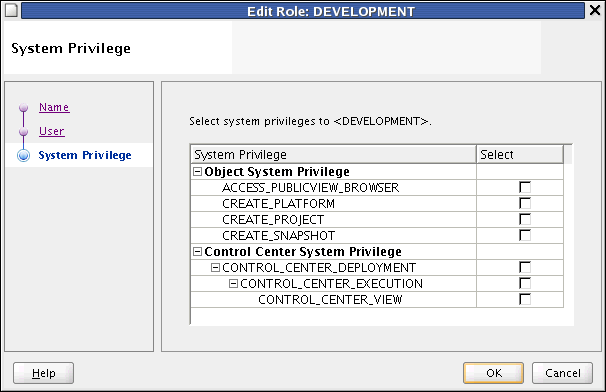
When the edits are complete, click OK.
You can assign multiple users to a role. If you want to assign a user that does not display on the Available Users list, then close the editor, create the user from the Security node in the Globals Navigator, and then edit the role. To create a new user, right-click Users from the Security node and select New User. For information on creating and editing users, see Registering Database Users and Editing User Profiles.
You can grant or restrict access to metadata objects on an object-by-object basis.
To change security properties of a specific metadata object:
Select the metadata object for changing.
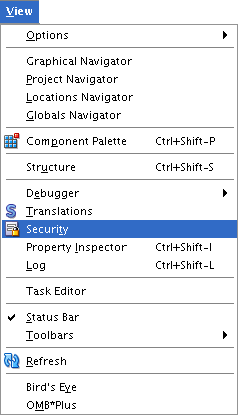
From the View menu, select Security.
Edit the security privileges for the object, granting and revoking them either at Role level, or at User level.
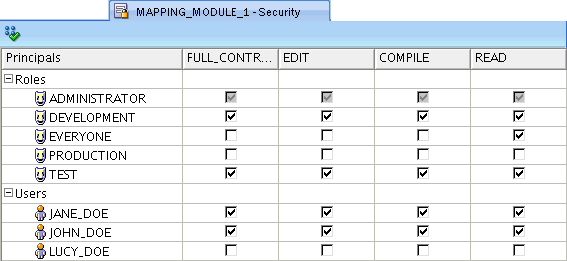
When all changes are made, from the File menu, select Save All.
Confirm changes.
Use the Security tab to define metadata security on an object-by-object basis. Only users that have full control privileges on an object can change the metadata access controls on the Security tab. Security properties are important in managing the life cycle of your projects, as described in "Example: Using Security Properties to Freeze a Project Design".
While the Default Object Privilege defines metadata security for objects a specific user creates, the Security tab overrides that metadata security policy on an object-by-object basis. Assume that JANE_DOE is a developer that creates mappings and process flows. If you want all objects created by JANE_DOE made available to another developer, such as JOHN_DOE, then use the Default Object Privilege. However, if you want to make only a few objects created by JANE_DOE available to JOHN_DOE or even every user who has a TEST role, locate each object in the Design Center and alter its security options.
To enforce a full metadata strategy, edit the security properties for all projects in the Project navigator. By default, the EVERYONE role has its object privileges set to full control. Change the EVERYONE role privilege to be more restrictive and select Propagate Security Settings icon to apply the changes to all children.
Propagating Security Properties to Child Objects
You can apply security properties to an object and all its children by selecting Propagate on the Security tab. This option is disabled when you select an object that cannot have child objects.
When users complete the design of a project, you may want to freeze the contents of the project. Once you complete the following steps, only administrators can change the objects in the project.
To freeze a project design:
Log on as user with administrator privileges.
From the View menu, select Security.
On the Security tab, restrict the privileges for all users and roles other than the administrators, as appropriate.
Click Propagate Security Settings icon.
When any user attempts to perform an operation in Warehouse Builder, Warehouse Builder first verifies that the user has the required privileges to perform the operation. Table 13-1 lists the privileges required to run operations in Warehouse Builder.
Table 13-1 Privileges Required for the Execution of Operations
| Warehouse Builder Operation | Security Check |
|---|---|
|
Configure |
User must have |
|
Copy |
User must have |
|
Create object |
User must have |
|
Cut |
User must have |
|
Delete |
User must have |
|
Deploy |
User must have |
|
Edit |
User must have |
|
Export |
User must have |
|
Generate |
User must have |
|
Import |
User must have |
|
Move |
User must have privileges listed for the Cut and Paste operations. |
|
Paste |
User must have |
|
Rename |
User must have |
|
Snapshot: compare snapshots |
To compare with another snapshot or other repository object, user must have |
|
Snapshot: restore snapshot |
To restore an object based on a snapshot, a user must have |
|
Snapshot: take snapshot |
User must have the |
|
Source import |
User must have |
|
Synchronize inbound |
User must have |
|
Synchronize outbound |
User must have |
|
Validate |
User must have |
You can manage passwords within Warehouse Builder in the following ways:
The logon dialog that appears when the Warehouse Builder Design Center is launched retains a list of previously used credentials. This is a convenience for Design Center users who frequently work with the same workspaces. The feature enables OWB to remember log in information.
In keeping with standard security practices, you may want to periodically change the passwords used to access Warehouse Builder repositories.
Changing Passwords that Access Design Repositories
Manage the password to design repositories as you would any other Oracle Database.
Changing Passwords that Access Control Centers
To change the password for a repository that hosts a Control Center and is therefore a deployment environment, you must first stop the Control Center service, run a script to change the password, and restart the Control Center service.
To change the password for a repository that hosts a Control Center:
Log on to the Control Center as the repository owner.
Stop the Control Center by running the script OWB_HOME/owb/rtp/sql/stop_service.sql.
The script returns values of Unavailable or Available to indicate the status of Control Center.
Change the password by running the script OWB_HOME/owb/rtp/sql/set_repository_password.sql.
When prompted, specify the new password.
Restart the Control Center by running the script
OWB_ORACLE_HOME/owb/rtp/sql/start_service.sql.
Warehouse Builder users create a location for each database, file server, or application that want to extract or load metadata and data. Locations include the user name and password used to access these various sources and targets. Warehouse Builder can store these passwords in the repository in an encrypted manner. The switch that turns on and off the password storage is Persist Location Password in Metadata, which is located in the Design Center under Tools, Preferences, Security Parameters.
The default encryption algorithm utilized is DES56C that is valid for Oracle Database 9i and subsequent versions. If the repository Database is version 10g or later, then you can set the encryption algorithm to 3DES168 or any other more powerful encryption by changing OWB_HOME/owb/bin/admin/jdbcdriver.properties file and specifying the following encryption parameters:
encryption_client; default = REQUIRED
encryption_types_client; default = ( DES56C )
crypto_checksum_client; default = REQUESTED
crypto_checksum_types_client; default = ( MD5 )
For the protocol to work, set the server to the default ACCEPTED mode. For more information, see Oracle Database JDBC Developer's Guide.